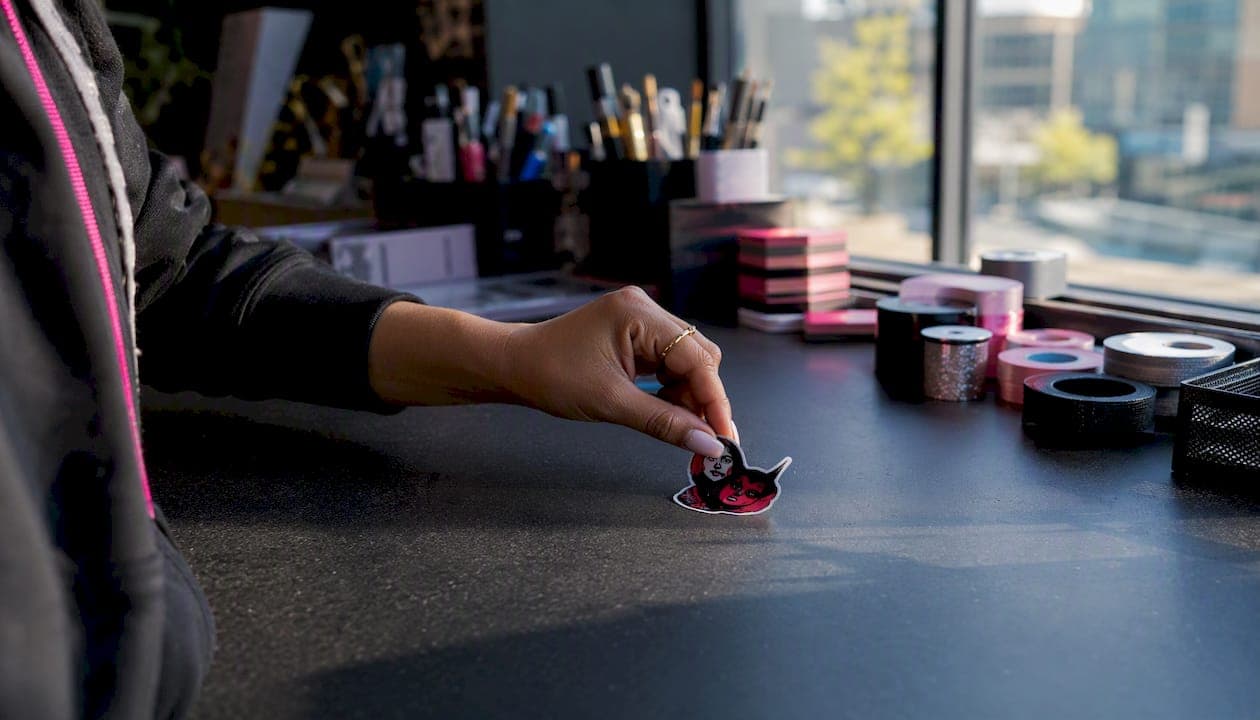
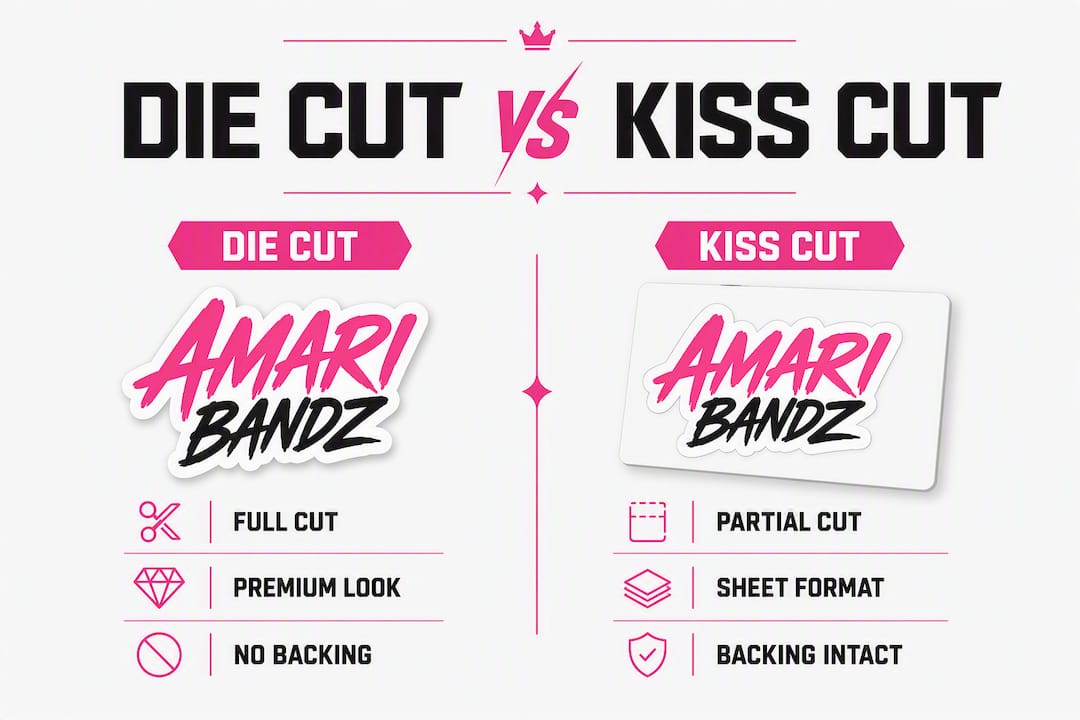
Die cut goes all the way through the sticker and the backing, leaving a clean, shape-matched piece ready to hand out or stick. Kiss cut only slices the top sticker layer, leaving the liner intact so multiple designs can live on one sheet. Short version: go die cut for individual merch stickers and premium handouts; go kiss cut for sticker sheets, delicate shapes, or any high-volume application workflow.
- Pick die cut when you want a retail-ready, fully contoured sticker that stands alone, like a logo decal or a merch table giveaway.
- Pick kiss cut when you need a sheet of multiple designs, easier peeling, or extra backing protection for intricate artwork in transit.
Table of Contents
- What exactly is a die cut sticker?
- What exactly is a kiss cut sticker?
- How do the two cuts compare side by side?
- When should you choose die cut vs kiss cut?
- What drives the cost and production timeline?
- How to prep your artwork for ordering
- Where each cut shows up in the real world
- How Amaribandz approaches sticker merch
- Does adhesive type interact with the cut style?
- Environmental considerations: which cut produces less waste?
- Key Takeaways
- The cut that actually sells merch
- Amaribandz stickers and merch, made for fans
- Useful sources
What exactly is a die cut sticker?
A die cut sticker is trimmed completely through both the sticker material and the backing paper, following the exact contour of the artwork. Pull one off a stack and it has no extra border, no white rectangle around it — just the shape of the design itself.
The name comes from old industrial manufacturing, where a metal "die" (a shaped blade pressed into material) was used to stamp out forms. Most small and mid-run orders today use digital plotter blades or laser cutters that trace the artwork path automatically, so there is no physical metal die involved. The industry still calls it die cut regardless, because the result is the same: a fully separated, contour-cut sticker.
The practical upside is presentation. A die cut sticker looks finished and intentional, which is why it shows up on product labels, laptop decals, and merch table pieces where first impressions matter.
Pro Tip: When photographing die cut stickers for a shop listing or social post, shoot them on a contrasting surface. The clean edge reads clearly in photos, which is half the reason to order die cut in the first place.
What exactly is a kiss cut sticker?
A kiss cut sticker is cut so the blade "kisses" the top sticker layer without penetrating the liner underneath. The term traces back to die-cutting processes historically used in leather and label manufacturing, where a shallow cut that stopped just short of the backing was called a kiss. The backing stays whole, which means the sticker stays protected until someone peels it off deliberately.

That intact liner does a few things. It keeps delicate points and thin spikes from bending or tearing during shipping. It lets you print multiple stickers on a single sheet, each with its own cut path, so a fan gets six different designs on one piece of paper. And it makes peeling fast, because there is always a clean edge of backing to grip.
Kiss cut stickers are generally more cost-effective for bulk orders and easier to apply quickly, which is why they dominate sticker sheet products, planner stickers, and promotional inserts.
Pro Tip: On a kiss cut sheet, the space between stickers is not wasted. Use it for a promo code, a lyric snippet, or a QR code that links to new music. Fans notice the details.
How do the two cuts compare side by side?
| Dimension | Die Cut | Kiss Cut |
|---|---|---|
| Appearance / finished look | Clean contour edge, no border, retail-ready | Sticker shape cut within a larger backing sheet or border |
| Peelability / ease of application | Requires peeling from a flat surface; trickier on tiny shapes | Easy to peel; backing gives a grip edge |
| Protection during transport | No liner; edges and points exposed | Liner intact; delicate shapes protected |
| Cost / price per unit | Slightly higher per piece at low quantities | Lower per piece for bulk sheets; ranges from $0.08–$0.50 per sticker depending on size and quantity |
| Best for | Single stickers, merch, product labels, giveaways | Sticker sheets, planners, promotional packs, intricate art |
| Materials & durability | Vinyl, paper, polyester; laminate adds outdoor durability | Same material options; liner adds structural support |
| Production speed / minimums | Digital cutting is fast; no tooling delay | Slightly faster for multi-design sheet layouts |
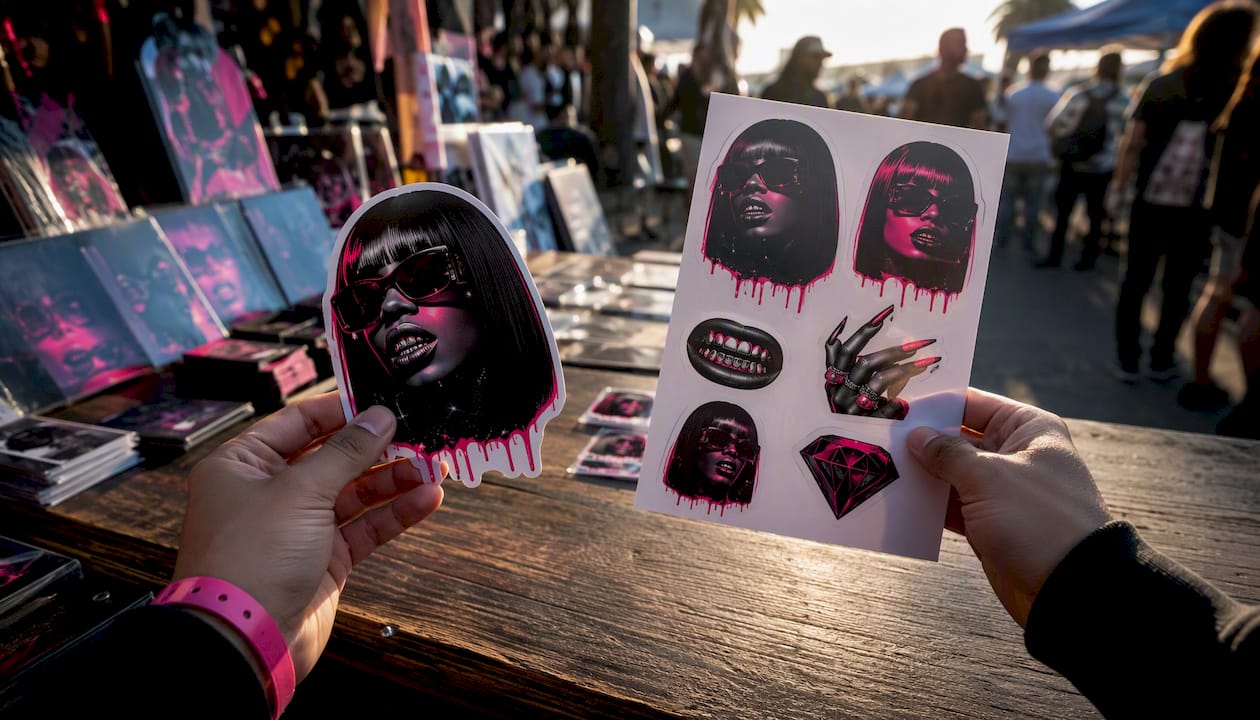
The two most decision-relevant contrasts: die cut wins on presentation, kiss cut wins on practicality at volume. If you are handing one sticker to one person and want it to look premium, die cut. If you are shipping 500 sticker packs with four designs each, kiss cut is the obvious call.
When should you choose die cut vs kiss cut?
The right cut usually comes down to how the sticker will be delivered and used.
Choose die cut when:
- You are selling or giving away a single sticker as a standalone item, like a logo decal or artist merch piece.
- The sticker goes directly onto a product, laptop, water bottle, or packaging where a clean edge matters visually.
- You want a premium handout feel at a show or retail pop-up.
- The design is bold and simple enough that a contour cut reads clearly without thin spikes that could tear.
- You are producing small die-cut logo stickers for branding on packaging inserts.
Choose kiss cut when:
- You are printing a sheet with multiple designs, like a fan sticker pack or planner sticker set.
- The artwork has very thin spikes, fine details, or delicate geometry that would bend or peel without backing support.
- You need fast application in a high-volume workflow, such as labeling packaging on a production line.
- You want to include a promo code, QR code, or lyric on the backing paper itself.
- Kids' stickers or event giveaway sheets, where ease of peeling matters.
One edge case worth noting: a combined cut job uses both on the same sheet, with kiss cut paths for individual stickers and a die cut path for the outer sheet shape. It costs more and requires careful file prep, but it gives you the best of both formats for a premium merch insert.
What drives the cost and production timeline?
Modern custom sticker printing relies almost entirely on digital plotter blades and laser cutters rather than physical metal dies. That shift matters for your budget: no tooling fees means a small run of 25 custom-shaped stickers costs roughly the same per piece as a run of 50, at least on the cutting side.
What actually moves the price:
- Quantity: More units almost always means a lower per-piece cost. CubitPackaging reports per-sticker prices ranging from $0.08 to $0.50, with the lower end reached at higher quantities.
- Size: Larger stickers use more material and more cutting time.
- Laminate: A gloss or matte laminate adds cost but extends outdoor durability significantly.
- Adhesive type: Removable adhesives cost slightly more than permanent ones.
- Cut complexity: Intricate contours with many nodes take longer to cut and may add to setup time.
- Sheet layout: Kiss cut sheets with multiple designs require separate cut paths per design, which adds file complexity.
| Quantity | Approximate price per sticker |
|---|---|
| 25 | ~$0.50 |
| — | ~$0.08 |
Figures from CubitPackaging's die-cut pricing guide; actual quotes vary by printer, size, and material.
Pro Tip: Ask your printer about gang-run or sheet-nesting options. Fitting more designs onto a single sheet before cutting reduces material waste and often drops your per-piece cost without changing the minimum order.
How to prep your artwork for ordering
Getting the cut right starts in the file. A missing spot color layer or wrong layer order is the most common reason a sticker order comes back wrong.
- Create a separate cut contour layer. Name it exactly as your printer specifies. Avery's design guidance uses named spot colors:
CutContourfor die cut paths andKissCutfor kiss cut paths. Most printers follow similar conventions; confirm before you submit. - Stack layers correctly. For combined cuts, the
CutContourlayer must sit above theKissCutlayer in the file. Wrong order means wrong cut. - Set a minimum gap of 0.125" between cut paths. When using both cut types on one sheet, a minimum 1/8" clearance between the kiss cut path and any die cut path prevents the cutter from tearing the material.
- Add bleed and safe zones. Extend your artwork at least 1/8" beyond the cut line (bleed). Keep all critical design elements at least 1/8" inside the cut line (safe zone).
- Export in the right format. PDF/X-1a, AI (Adobe Illustrator), or EPS with embedded fonts and outlined text. Include the vector cut path in the same file, on its own layer.
- Avoid thin spikes near the cut edge. Any point thinner than about 1/16" at the tip is likely to tear during cutting or peel prematurely in transit.
Warning: Always request a digital proof before approving a full run. Even a correctly built file can have scaling or resolution issues that only show up in the printer's preflight. A proof costs nothing compared to reprinting 500 stickers.
Pro Tip: Download the printer's template file before you start designing, not after. Building your artwork inside the template from the start eliminates most file-prep errors before they happen.
Where each cut shows up in the real world
Die cut and kiss cut each have a natural home, and knowing where they land helps map your own project.
Die cut in practice: Laptop decals are the classic example, where the clean edge is the whole point. Logo stickers for a merch table work the same way — a contour-cut sticker sitting on a table looks like a product, not a printout. Retail product labels on jars, bottles, or boxes often use die cut for the same reason: the shape signals quality. Single-item giveaways at events, where someone receives one sticker and immediately sticks it somewhere, are a natural fit.
Kiss cut in practice: Planner sticker sheets are almost always kiss cut, since the user peels individual stickers from a sheet over days or weeks. Promotional cards with a removable sticker attached — think a download card with a sticker on the front — use kiss cut so the sticker peels cleanly without damaging the card. High-volume packaging labels on a production line benefit from the backing's rigidity, which keeps labels flat and feeds them through applicators reliably.
For outdoor use, pair either cut with a vinyl substrate and a UV-laminate finish. For indoor or packaging applications, coated paper stock is lighter and cheaper. Kiss cut backing helps protect delicate points from peeling or bending during shipping, which makes it the safer default for intricate artwork regardless of where it ends up.
Pro Tip: For merch that ships in an envelope, kiss cut is almost always the right call. The backing keeps corners and tips intact through postal handling in a way that bare die cut stickers simply cannot match.
How Amaribandz approaches sticker merch
Choosing between these two cuts for fan experiences comes down to what the sticker is supposed to do. For a single logo sticker sold at a merch table or included as a premium add-on with an order, die cut is the move. The clean edge, the shape that matches the artwork exactly — that is what makes it feel like something worth keeping rather than something that came in a box.
For fan packs and multi-design sheets, kiss cut makes more sense. A sheet with four or five designs, each with its own cut path, gives fans something to interact with. They peel what they want, keep the rest. The backing is also real estate: a promo code, a lyric from "Currency," a QR code to a new track — all of that fits in the margin space that a die cut sticker simply does not have.
Presentation affects perceived value at shows. A die cut sticker in a clear sleeve looks like merch. A kiss cut sheet folded into a zine-style pack looks like a collectible. Both are right, just for different moments.
Pro Tip: Bundle a kiss cut sticker sheet with a download card for a physical merch insert that gives fans both something to stick and something to scan. It is a low-cost add-on that punches well above its price point in fan engagement.
Does adhesive type interact with the cut style?
The cut style does not change the adhesive chemistry, but it does affect how the adhesive performs in practice. Die cut stickers expose the adhesive edge all the way around the contour, which means the bond starts the moment the sticker touches a surface. That is fine for permanent applications, but it makes repositioning nearly impossible on small or intricate shapes.
Kiss cut stickers, with their intact liner, keep the adhesive protected until the moment of application. That matters for removable adhesives in particular: a removable kiss cut sticker on a backing sheet stays clean and tack-fresh through shipping and storage, then peels off and repositions cleanly on a wall or notebook cover. The same removable adhesive on a bare die cut sticker can pick up dust or oils from handling before it ever reaches a surface, reducing its grip.
Permanent adhesives work well with both cut styles. Removable and repositionable adhesives pair better with kiss cut, because the liner protects the adhesive until it is needed. For outdoor vinyl stickers meant to stay on a car or water bottle for years, die cut with a permanent adhesive and UV laminate is the standard combination.
Environmental considerations: which cut produces less waste?
Kiss cut generates more material waste per sticker than die cut, because the matrix (the excess sticker material between and around the cut shapes) stays attached to the liner and is discarded after the sheet is used. Die cut removes that matrix at the printer, where it can sometimes be recycled in bulk, but the liner itself is still waste.
Neither format is waste-free. The honest comparison: die cut sheets produce a liner offcut at the printer; kiss cut sheets produce both a liner and a sticker-matrix offcut at the end user's location, often in a household recycling bin where silicone-coated liners are not accepted by most curbside programs.
A few practical steps reduce the footprint of either format. Choosing paper-based substrates over vinyl makes the sticker itself more recyclable. Requesting a printer that uses FSC-certified paper stock addresses the material sourcing side. For high-volume orders, asking about liner recycling programs (some commercial printers participate in them) is worth the conversation. Sheet layout efficiency also matters: a tightly nested kiss cut sheet with minimal gap between designs wastes less material than a loosely spaced one, which is another reason to optimize your layout before sending the file.
Key Takeaways
Die cut is the right choice for individual, premium-presentation stickers; kiss cut wins for sheets, delicate shapes, and bulk orders where backing protection and peelability matter most.
| Point | Details |
|---|---|
| Die cut = full contour cut | Blade cuts through sticker and liner; no backing border remains on the finished piece. |
| Kiss cut = top layer only | Liner stays intact, protecting delicate edges and enabling multi-sticker sheet layouts. |
| Cost driver is quantity and layout | Per-sticker prices range from $0.08 to $0.50; sheet nesting and higher quantities lower the per-piece cost. |
| File prep is the most common failure point | Use named spot colors (CutContour, KissCut), maintain a 0.125" gap between cut paths, and always request a proof. |
| Amaribandz merch strategy | Die cut for single premium stickers at shows; kiss cut sheets for fan packs with promo codes or lyrics on the backing. |
The cut that actually sells merch
Most sticker guides treat the die cut vs kiss cut question as a technical one. It is not, really. It is a question about what you want the fan to feel when they hold it.
A die cut sticker handed to someone at a show has weight to it, conceptually. It is a finished object. The shape is intentional. That is why it works as a premium add-on or a standalone merch piece — it signals that someone cared about the details. Kiss cut sheets do something different. They invite participation. The fan gets to choose which sticker goes where, and the backing becomes part of the experience rather than packaging to throw away.
What gets overlooked is that the backing on a kiss cut sheet is the cheapest real estate in merch. A lyric, a release date, a code for a free download — that space costs nothing extra to print and it turns a $1 sticker into a conversation. That is the detail most merch guides skip entirely.
Amaribandz stickers and merch, made for fans
If this guide helped you figure out which cut to order, the next step is seeing what a well-executed sticker looks like in practice. Amaribandz merch is designed with exactly this thinking: die cut logo stickers for the collectors, kiss cut fan sheets for the shows and the packs.

Every piece in the Amaribandz merch store is built around the same principle that runs through this guide — presentation affects perceived value, and the details matter. Whether you are picking up a sticker for your laptop or a full merch pack, the quality is there. Head to the Amaribandz store and grab what fits your wall, your notebook, or your collection.
Useful sources
- Die cutting / Kiss cutting — Wikipedia: foundational definitions and manufacturing history.
- Avery — Die cut vs kiss cut design guidance: spot-color naming conventions and combined-cut file prep.
- 4over4 — Die cut explanation and practitioner guidance: full-contour cutting process and event-handout recommendations.
- CubitPackaging — Die-cut guide and pricing: per-piece price ranges and quantity examples.
- Shopify — Kiss cut vs die cut: sheet printing and layout advantages for multi-design orders.
- PrintRunner — Die-cut vs kiss-cut differences: peelability, bulk use cases, and cost comparison.
- College of DuPage — Designing for kiss cuts: minimum spacing and layer rules for combined cut files.
- PrintReviewer — Practical differences and recommendations: transit protection and intricate design guidance.
- UpNComer — How to brand yourself as an artist: branding guidance for independent artists incorporating stickers and merch into their identity.
- Amaribandz — Standard poster sizes fan guide: merch presentation and layout decisions for creators.